Testing your Alpha Power Supply Module

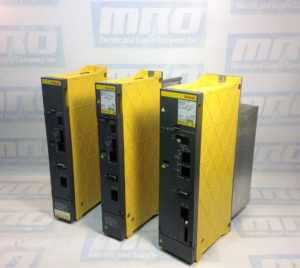
The following is a set of instructions to help you get your Alpha Power Supply Module to read “- -” on the display and have a consistent 300 volt DC output:

  1. Turn off the power. Make sure the charge light is off before doing anything. Check for a short between the bottom and top buss bars. If there is a short, disconnect all modules until the short disappears. Once there is no short, continue.
  2. Feed a 3 phase input into L1, L2, and L3 of the the power supply. Between 200V and 220V AC for leg to leg connections and between 100V and 110V AC for let to ground connections.
  3. Feed 200V into the CX1A connector.
  4. Install a jumper onto the top/bottom pins of the grouping of 3 pins on the CX3/MCC cable coming into the power supply.
  5. Install a jumper onto the top two pins of the grouping of 3 pins on the CX4 cable on the power supply.
  6. Make sure that all screws on the PCB are tightly screwed in.

alpha-power-supply

After following this process, your power supply module should now read “- -” and have baseline voltage output. Sometimes you may not have the necessary equipment to make a diagnosis on your motor, but we do. MRO Electric and Supply offers high quality repair services on all motors and spindle drives so you don’t have to worry about it. Please take a look at our website to see all available brands and parts we can service for you. Our rebuilds for these size drives usually only take 2-3 days, which includes rebuilding the part, painting the part, and fully testing the part to ensure top quality. By getting your part back to you as soon as possible, you are able to minimize downtime, and by doing the job right you can have peace of mind knowing that your FANUC drive will now work properly and not be the reason for downtime in the future.

MRO Electric and Supply has new and refurbished FANUC CNC parts available. For more information, please call 800-691-8511 or email sales@mroelectric.com.

Updated on May 15, 2020 by David Link

FANUC Alarm Codes – A06B-6066 Drives – Alarm 5

The following is a list of procedures to fix the Alarm 5 status on your drive:

  • If you are receiving the alarm after a fresh install of the drive, check to make sure all jumpers and wires are set in their correct position. You can find the location for these inside your user manual.
  • Make sure the drive is off. Check the resistances on the drive, and then test the voltage. If it has been powered up recently, you can then turn it on to check the voltage again. However, do not immediately turn it back off to check the resistances again. You must give it at least 30 minutes for the voltage to return to safe levels so that you can check again.
  • To check the voltage, you can test the DC voltage of the jumper attached between screws 17/18 and 19.
  • Using your ground on screw 19 and and the red lead on the other two screws, your reader should say anywhere from .003 to .006 volts.
  • To check the resistance, remove the jumper from screws 15/16 and then tighten the screws. Use an ohm reader to make sure the resistance isn’t OPEN.
  • Check the resistance between screws 17 and 18. If it is 16 ohms that is where you want it to be.

fanuc cnc

Sometimes you may not have the necessary equipment to make a diagnosis on your motor, but we do. MRO Electric and Supply offers high quality repair services on all motors and spindle drives so you don’t have to worry about it. Please take a look at our website to see all available brands and parts we can service for you. Our rebuilds for these size drives usually only take 2-3 days, which includes rebuilding the part, painting the part, and fully testing the part to ensure top quality. By getting your part back to you as soon as possible, you are able to minimize downtime, and by doing the job right you can have peace of mind knowing that your FANUC drive will now work properly and not be the reason for downtime in the future.

MRO Electric and Supply has new and refurbished FANUC CNC parts available. For more information, please call 800-691-8511 or email sales@mroelectric.com.

Updated on March 5, 2020 by Brian Hughes

Instructions for Installing a 6055 Spindle Drive to A20B-1001-0120

The following is a list of instructions for installing a 6055 Spindle Drive with the A20B-1001-0120 Spindle Drive PCB:

A20B-1001-0120

Instructions:

  1. Make sure the jumpers on the new spindle PCB match the jumpers on your old spindle PCB.
  2. Remove the software chips from the old spindle PCB and install them onto the new spindle PCB.
  3. If possible, remove the NVRAM chip from the old spindle PCB and install it onto the new spindle PCB. This way you will not have to reprogram the chip as the new spindle will have the same instructions as the previous one.
  4. If possible, remove the DAC chip from the old spindle PCB and install is onto the new PCB. There may not be a DAC chip on your previous board and if that is the case do not worry about it. However if the old board does have the chip, failure to install it correctly into the new board will cause issues.
  5. Make sure to set the 200/230 voltage switch to the same setting it is on the old board. This switch also may not be on all drives.

It is very important to follow the manual and make sure that the chips and cards you are moving around are installed correctly. For instance, if you were to incorrectly install the software chips, not only would the display not show anything, you are leaving open the possibilities for a short and causing yourself even more trouble.

Sometimes you may not have the necessary equipment to make a diagnosis on your motor, but we do. MRO Electric and Supply offers high quality repair services on all motors and spindle drives so you don’t have to worry about it. Please take a look at our website to see all available brands and parts we can service for you. Our rebuilds for these size drives usually only take 2-3 days, which includes rebuilding the part, painting the part, and fully testing the part to ensure top quality. By getting your part back to you as soon as possible, you are able to minimize downtime, and by doing the job right you can have peace of mind knowing that your FANUC drive will now work properly and not be the reason for downtime in the future.

MRO Electric and Supply has new and refurbished FANUC CNC parts available. For more information, please call 800-691-8511 or email sales@mroelectric.com.

Updated on March 5, 2020 by Brian Hughes