What is a FANUC Servo Alarm 8, 9, or A?
Before we dive in, let’s discuss what exactly a FANUC servo alarm is.
When a Fanuc Alpha Servo drive shows an A, 9, or 8 alarm, this is indicative of a short circuit or high current in the motor or amplifier. To fix this, you must determine which axis is at fault. Make sure you’ve checked this is not a mechanical failure or even a binding condition beforehand.
The alarm will point to this area:
- FANUC servo drive alarm 8 is the L axis
- FANUC servo drive alarm 9 is the M axis
- FANUC servo drive alarm A is the N axis
Troubleshooting FANUC Servo Alarm 8,9, or A
This troubleshooting guide is in reference to Fanuc drives that begin with part number A06B-6079, A06B-6080, and A06B-6096 and is meant to help troubleshoot Fanuc servo amplifiers faults. Before you continue to determine what’s happening to your servo amp, make sure to check for the following:
1 – Determine if your servo amp or motor is defective.
If the alarm is occurring before the motor power is present, consider checking either the servo amp or the feedback circuit. Do this by disconnecting the feedback cable and turning on the power. This will isolate the failure. If you have no alarm, this means the problem lies with the feedback cable or a pulse coder. If the fault remains, the servo amp is the issue.
If the alarm does not occur before motor power, then you will need to continue following the below steps.
If the alarm occurs when motor power is present, the problem might lie with the motor power circuit or the servo amplifier. Disconnect the power cable and turn the machine on. If this action results in the alarm continuing, the problem is with the servo amp. If this action ceases the alarm, follow the next steps.
2 – Shut off the power
Never forget safety when working with these devices. For the proceeding steps, make sure to disconnect the servo amplifier. Also keep in mind, if a drive status alarm appears on the 7 segment display, where the “-” refers to drive not ready (Waiting for an Emergency Stop signal to power up) and “0” refers to drive powering up correctly. Any other number or letter on this status display is one of the FANUC alarm codes. This is one of the more common faults, the FANUC servo Alarm 8.
Here are the steps to check to see what the issue may be when an alarm comes up on your drive.
FANUC Alarm Code 8, 9, or A Steps
1 – Check the link
(A06B-6079 drives only). An A06B-6079 drive can give a fault if the S1 Link is in the wrong position, so check the S1 – JV Connections (Type A Interface) and S2 – JS Connections (Type B Interface). An incorrect setting will cause a FANUC Drive Alarm “8”.
2 – Check the wiring
A L motor is wired in the lower terminals and an M motor is wired in the upper terminals, both as U/V/W/E. JV1B connected from the L command plug of the axis card, JV2B from the M command plug. JX1A connected from previous drive, JX1B connected to the next drive in the line. The last drive in the line has a terminator in JX1B. 24v/0v/ESP connected into CX1A from the previous drive, out of CX1B to the next drive in the line.
3 – Disconnect motor cable
Meggar the motor to check the readings.
4 – Power machine on
Do this while it is in an emergency stop. The drive is faulty if an alarm occurs, expect a “-” reading.
5 – Release Emergency Stop
Power the machine up after releasing the stop. If an alarm occurs, power the machine off and remove motor wires U/V/W/E (Note – this is dangerous on a vertical axis, brake release, slide drops etc). Release Emergency Stop and power the machine up. The drive is faulty if the alarm occurs, expect “0” reading.
Alternative Options
If these steps do not help, an additional test can be performed for equally sized 6079/6080 amplifiers H201 SVM2-12/12 H301 SVM2-12/12/12 H203 SVM2-20/20 H302 SVM3-12/12/20 (L&M) H206 SVM2-40/40 H303 SVM3-12/20/20 (M&N) H208 SVM2-80/80 H304 SVM3-20/20/20 (L/M&N) The suspect axis can be run from the other amplifier in the drive ie X drives M amplifier, Y drives L amplifier. To do this swap round a – X & Y Motor cables U/V/W/E (at the drive) and b – X & Y Command cables (at the drive) (6096 requires parameters changing to swap X & Y round).
The drive is faulty if the alarm remains the same as before the test. For example Alarm “8” is reported on a 6079-H201 drive using JV connections Steps 1~5 above, have been performed and still alarm “8”. Remove the servo motor wires from the lower terminals and reconnect into the upper terminals, upper into lower. Remove JV1B and insert into JV2B, JV2B into JV1B. Retest the machine.
The drive is faulty if the same alarm occurs, ie alarm “8” The fault lies elsewhere on the machine if another alarm occurs, ie alarm “9”. In this example the drive has detected an overcurrent from the L axis, alarm “8” Swapping the cables over allowed a different amplifier to control the axis. An “8” alarm would remain if the same drive circuitry detected the overcurrent. A “9” would occur if the overcurrent was detected using the other drive circuitry in the amplifier and the fault would be caused externally from the drive.
Still having trouble with your Fanuc Servo Alarm 8, 9, or A?
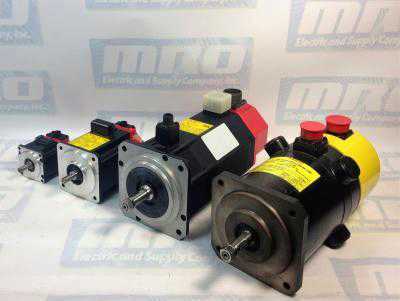
Contact MRO Electric for help. Get yourself a new FANUC servo amplifier or check out our FANUC servo motors. MRO Electric and Supply supplies and repairs a large number of FANUC Servo Drives. To request a quote, please call 800-691-8511 or email sales@mroelectric.com.
Updated on April 26, 2024 by Leanna Cota
great help thanks
I didn’t know what the dash means Thank to you now I know and I think I found the problem thanks.